Lettering
 Cart
Cart Installation
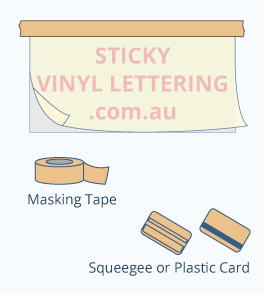
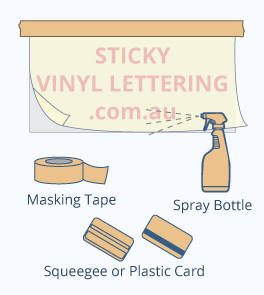
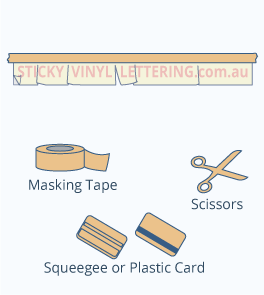
 Materials
 FAQ
FAQ Contact
 Home
Home Gallery
Installation Guide
+Before Installation
Surface Preparation.
Dirt and dust particles will cause vinyl lettering to bubble and not to stick properly. Clean the destination surface to remove any dirt and oils. Dry surface thoroughly. Decal Preparation.
The vinyl decal may have pulled away from the transfer tape during shipping. This action will adhere the vinyl decal to the transfer tape.
Surface
Preparation Clean destination surface to remove any dirt and grease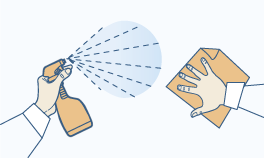
Preparation Clean destination surface to remove any dirt and grease
Decal
preparation Squeegee thoroughly across the entire decal surface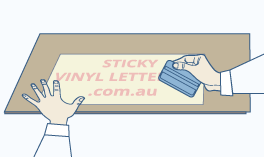
preparation Squeegee thoroughly across the entire decal surface
Dry
General application method for small or medium size decals
Wet
General application method for medium or large size decals
Hinge
Great application method for long lettering and decals

Cut Apart
Application method for long decals with spaces between letters
Please see illustrated descriptions of installation methods below.
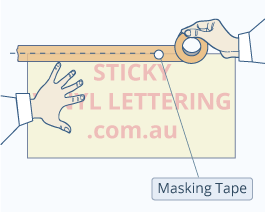
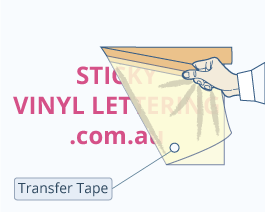
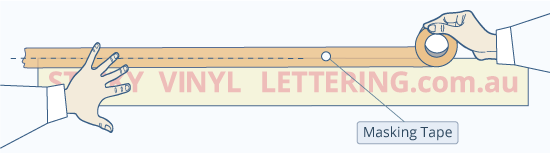
1. POSITION AND SECURE THE DECAL
Check the level and position and secure with Masking Tape
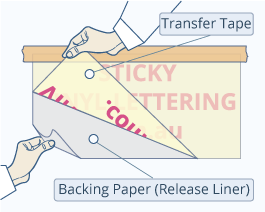
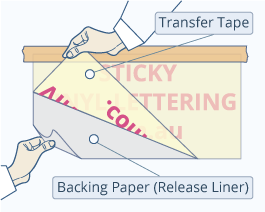
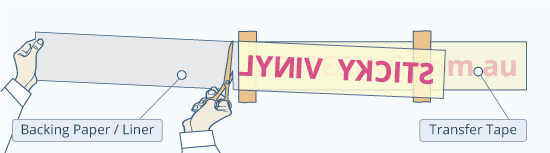
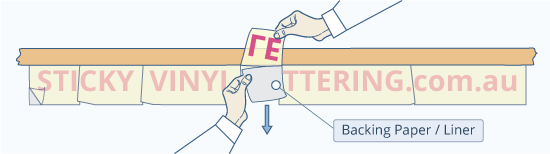
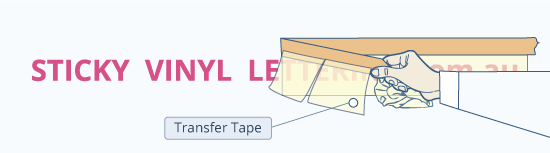
2. REMOVE THE BACKING PAPER
Lift the Transfer Tape up and remove the Backing Paper
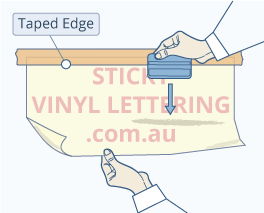
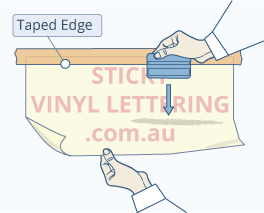
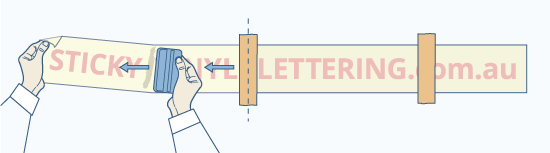
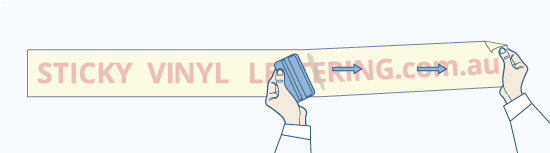
3. SQUEEGEE TO APPLY THE LETTERING
Start from Taped Edge and move towards the other edge
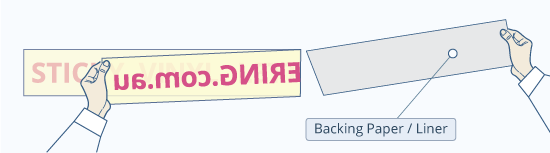
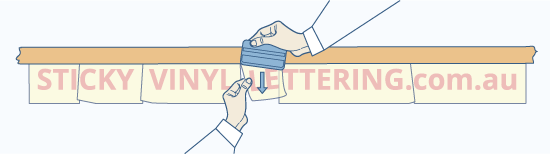
4. REMOVE THE TRANSFER TAPE
Remove the Transfer Tape at a 180 degree angle
1. POSITION AND SECURE THE DECAL
Check the level and position and secure with Masking Tape

2. REMOVE THE BACKING PAPER
Lift the Transfer Tape up and remove the Backing Paper
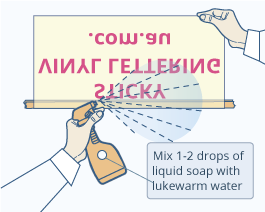
3. SRAY LETTERING AND SURFACE
Spray the surface and adhesive side of vinyl with soap water
4. SQUEEGEE TO APPLY THE LETTERING
Start from Taped Edge and move towards the other edge
5. PUSH THE WATER OUT
Properly squeegee the decal to get excess water out
6. REMOVE THE TRANSFER TAPE
Wait until the lettering is sufficiently dry before removing

1. POSITION AND SECURE THE DECAL
Tape vertically in the middle to create a “hinge”

2. REMOVE THE BACKING PAPER
Lift Transfer Tape up from one side and cut Liner off
3. SQUEEGEE TO APPLY THE LETTERING
Start from the middle “hinge”, move towards the outer edge
4. REMOVE THE BACKING PAPER
Lift the Transfer Tape up and remove the Backing Paper
5. SQUEEGEE TO APPLY THE LETTERING
Start from the middle “hinge”, move towards the outer edge
6. REMOVE THE TRANSFER TAPE
Remove the Transfer Tape at a 180 degree angle

1. POSITION AND SECURE THE DECAL
Check the level and position and secure with Masking Tape
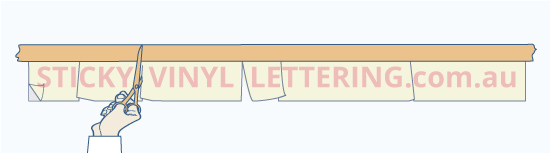
2. CUT DECAL INTO SEGMENTS
Only cut between letters not through the vinyl of the decal
3. REMOVE THE BACKING PAPER
Lift the Transfer Tape up and remove the Backing Paper
4. SQUEEGEE TO APPLY THE LETTERING
Start from taped edge and move towards the other edge
5. REMOVE THE TRANSFER TAPE
Remove the Transfer Tape at a 180 degree angle
6. INSTALLATION COMPLETE
Thank you for your order!